How-to
How to Carve a Linoleum Block: Cutting Tips for Beginners
Published Updated
As an Amazon Associate we earn from qualifying purchases. This does not change our picks. Affiliate disclosure
Short answer
Outline the design with a small V tool, then clear the white areas with a U gouge. Hold the tool low, push away from the hand that steadies the block, and take shallow passes: a channel 1 to 2 mm deep is enough on standard 1/8 in lino. To follow a curve, turn the block, not your wrist.
Gear for this job
All 6 picks comparedSpeedball 4131 Linoleum Cutter Set, 5 Types
See price on AmazonSee it on AmazonSpeedball 2-handle kit with 6 lino cutters
See price on AmazonSee it on AmazonFlexcut SK130 lino set, 4 blades and handle
See price on AmazonSee it on Amazon
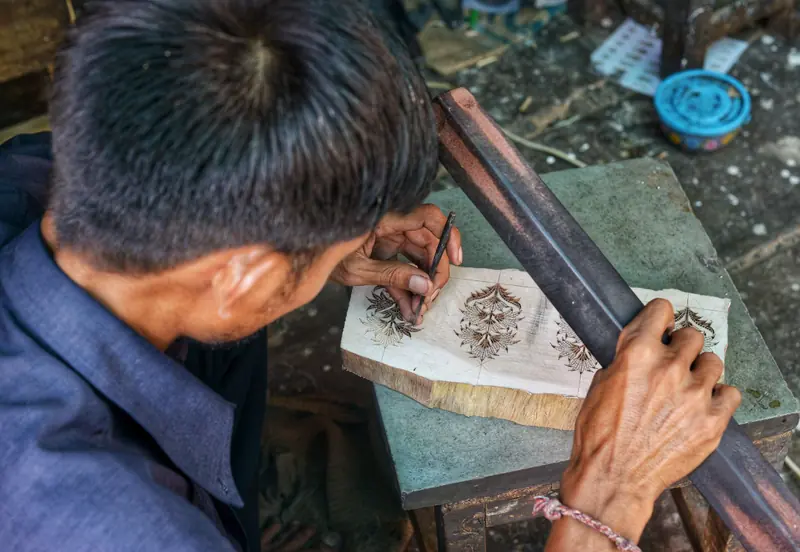
Lino cutting, linoleum block carving, carving a linocut: the job is the same under every name. You cut away what should stay white and leave the printing surface standing. Clean lines depend on three things more than on talent: a sharp tool, lino that is neither cold nor dried out, and a block that cannot slide. This page is for a first or second block, in battleship gray linoleum or a soft rubber block, cut with a handle and push-in cutters or with palm tools. It gives the order of the cuts, the depth, the grip, and what to do about the ridges left in cleared areas.
What do you use to cut lino?
A lino cutter: either one handle with interchangeable blades or a set of fixed palm tools. Three shapes do all the work. A V tool (V gouge) cuts lines and outlines, a U gouge clears and textures, and a knife cuts edges and trims the block. A first set needs one small V of 1 to 2 mm, one small U of 2 to 3 mm and one wide U of 5 mm or more.
On a Speedball handle the numbers are shape codes, not sizes: #1 Small V, #2 Large V, #3 Small U, #5 Large U, #6 Knife. The lino cutting tool size chart sets the other brands beside them. You also need something that holds the block still: a bench hook or a non-slip mat.
How to carve a linoleum block, step by step
The design is already on the block, reversed, because the print is a mirror image. If it is not, start with transferring the design. Then work from the finest cuts to the widest.
- 1
Fix the block. Hook a bench hook over the table edge or lay the block on a non-slip mat. It should not move when you push on it with one finger.
- 2
Make 3 or 4 test cuts with each blade in a margin or on a scrap of the same lino. It shows how hard the lino is today.
- 3
Outline with the small V tool, 1 to 2 mm wide. Cut on the waste side of every line, with the tool held low. Keep this first pass shallow: it only has to mark the edge.
- 4
Widen the outline. Run a small U gouge, 2 to 3 mm, along the waste side of the V cut so every printing shape is surrounded by a clear channel.
- 5
Clear the white areas with a wide U gouge, 5 mm or more. Push toward the channel and let the chip break off there. Take the floor down to 1 to 2 mm in passes, not in one deep cut.
- 6
Brush the crumbs off the block every few minutes so you can see the lines, and strop the edge often. One supplier guide says every 15 to 20 minutes of carving.
- 7
Check the block with a rubbing or a first proof, mark what still needs cutting, and cut again. You can always remove more lino. You cannot put it back.
Grip, tool angle and how deep to cut
Rest the handle in your palm with the index finger laid along the top of the blade. Keep the tool low to the surface and push with the whole forearm in short, steady strokes. The angle steers the depth: raise the handle a little and the edge dives, lower it and the edge climbs back out. End each stroke by lowering the handle so the chip lifts free instead of tearing.
How deep? A clean channel of 1 to 2 mm is usually enough. Speedball unmounted linoleum is 1/8 in (0.3 cm) thick, so that depth keeps the block strong and stays well clear of the backing. Fine lines inside a solid area can be shallower. Wide white areas need the full depth, because paper sags into them when you print by hand.
Note.Lean the V tool so the walls of a cut slope away from the line you are keeping. A wide base holds a thin line up. A line cut straight down or undercut on both sides breaks off.
Cut away from the holding hand and turn the block
The hand that steadies the block stays behind the cutting edge, always. Before each stroke, look where the tool would go if it slipped. If your other hand is there, move it or turn the block. A bench hook lets you push against a stop, so the holding hand only has to rest on the lino. No tool is injury-proof, and children carve with adult supervision. The full setup is on the lino cutting safety page.
The same habit gives better curves. Keep the tool pointing away from you and rotate the block into the cut with the holding hand. A wrist that twists to follow a curve changes the angle of the blade halfway through, and the line wobbles or the tool jumps out.
Common linoleum block carving faults and fixes
Most carving trouble has one of three causes: a dull edge, lino that is cold or old, or the wrong tool angle. Sharpen first, because a dull tool needs more force and more force means slips. See how to sharpen lino cutting tools and, for stiff blocks, how to soften lino.
| What you see | Likely cause | What to do |
|---|---|---|
| Tool skids over the surface | Dull edge, or the tool is held too flat | Strop the edge, then raise the handle slightly |
| Ragged or crumbling edges | Dull tool, cold lino, or old dried-out lino | Strop, warm the block gently, replace lino that crumbles |
| Tool digs in and stalls | Handle held too high, cut too deep | Lower the handle and take two shallow passes |
| Wobbly curves | The wrist is turning, not the block | Keep the tool pointing away and rotate the block |
| Thin lines break off | Walls cut straight down or undercut | Slope the walls away from the line |
| Cleared areas print as flecks | Ridges left between gouge strokes | Cut the ridges lower, or keep them as texture |
| Edges stretch on a soft block | Soft blocks give slightly under the tool | Lighter pressure, sharper edge, shallower passes |
Chatter in cleared areas: leave it or remove it
Chatter is the pattern of ridges a gouge leaves across a cleared area. Ridges that stand close to the surface catch ink from the brayer and print as flecks and short dashes. Many linocuts keep them on purpose: the marks show the direction of the cutting and fill empty space. If you want them, make the strokes follow the shape they surround.
If you want clean white, go over the area again with the widest U gouge and take the tops off the ridges. A flat-bottomed cutter such as the Speedball #4 Square U levels the floor. Cut deepest in the middle of wide areas, where paper sags most. Whatever is left, wipe stray ink off the low areas before you lay the paper.
How to tell the block is ready to print
Check before any ink goes on. Hold the block at a low angle under a lamp: the uncut surface shines and every cut shows as shadow. Then take a rubbing. Lay thin paper over the block and rub the side of a soft pencil or crayon across it. The rubbing shows what will print, including ridges you missed.
The block is done when every outline is unbroken, no ridge in a white area stands level with the surface, and the walls of thin lines slope outward. Then roll out a thin film of ink and pull one proof on thin paper. Correct from the proof, not from the block: mark the spots, clean the block and cut again.
Moving from lino to woodcut
Lino cutters are made for linoleum and rubber, and they dull or chip quickly on real wood. If you want to carve plank wood or plywood for woodcut prints, use palm gouges, V-parting tools and chisels instead, which hold an edge on a harder surface. The grain also changes how you cut: work with it, and expect more resistance across it. Our woodcut vs linocut comparison explains the differences in effort and print, and the wood carving tools guide lists seven palm and chisel sets by shape, width and steel.
Quick answers
Short answers to the questions people ask about cutting lino for the first time. The numbers are the same ones used in the steps above.
- How do you cut lino as a beginner? Outline with a small V tool, clear with a U gouge, and keep the holding hand behind the blade. Shallow passes on a block that cannot slide give the cleanest lines.
- What do you use to cut lino? A lino cutter with V and U blades, plus a bench hook or non-slip mat. On a Speedball handle, #1 and #2 are V tools, #3 and #5 are U gouges and #6 is a knife.
- How deep do you carve linoleum for block printing? About 1 to 2 mm on lino that is 1/8 in thick. Go to the full depth in wide white areas and stay shallower for fine lines.
- Any linoleum block carving tips for hard lino? Warm it gently on a radiator or with a hair dryer, and strop the tool. Too much heat hardens lino, so keep it mild.
What you need for this
- See price on AmazonAmazon
Speedball 4131 Linoleum Cutter Set, 5 Types
From Best Lino Cutting Tool Sets: Handles With Interchangeable Blades
- See price on AmazonAmazon
Pfeil L 12a/4 lino cutter, V tool, 4 mm
- See price on AmazonAmazon
SGHUO Pink Rubber Linoleum Blocks, 4x6, 12 Pcs
- See price on AmazonAmazon
Flexcut FR405 Deluxe Palm Gouge Set